Showing posts with label step-by-step. Show all posts

Saturday, January 21, 2012

Tutorial: Transforming bloomers into functional panties


If your three-year-old is anything like mine, sooner or later, if she's wearing a dress, everybody will get to see the Care Bears panties she wore that day.  So even though she's potty trained, I tend to still make either fancy knickers to go underneath, or matching ones.  Examine the difference between the patterns and the RTW variety, and the main difference is that RTW panties have a double layer gusset between the legs. 

So if you sew in a knit gusset to keep sensitive areas away from seams, they become functional panties.  My first move was to trace the shape of the RTW gusset.  I did make it a bit wider, because, after all, these are poofy blomers!  Next, I assembled the panties in question, except for the leg elastic. 


My original thought was to sew the crotch seam first and not the side seams, but a bit of fiddling proved to me that for this pair, at least, that wouldn't work.


I cut the gusset from a scrap of knit, and it ended up
looking like this:

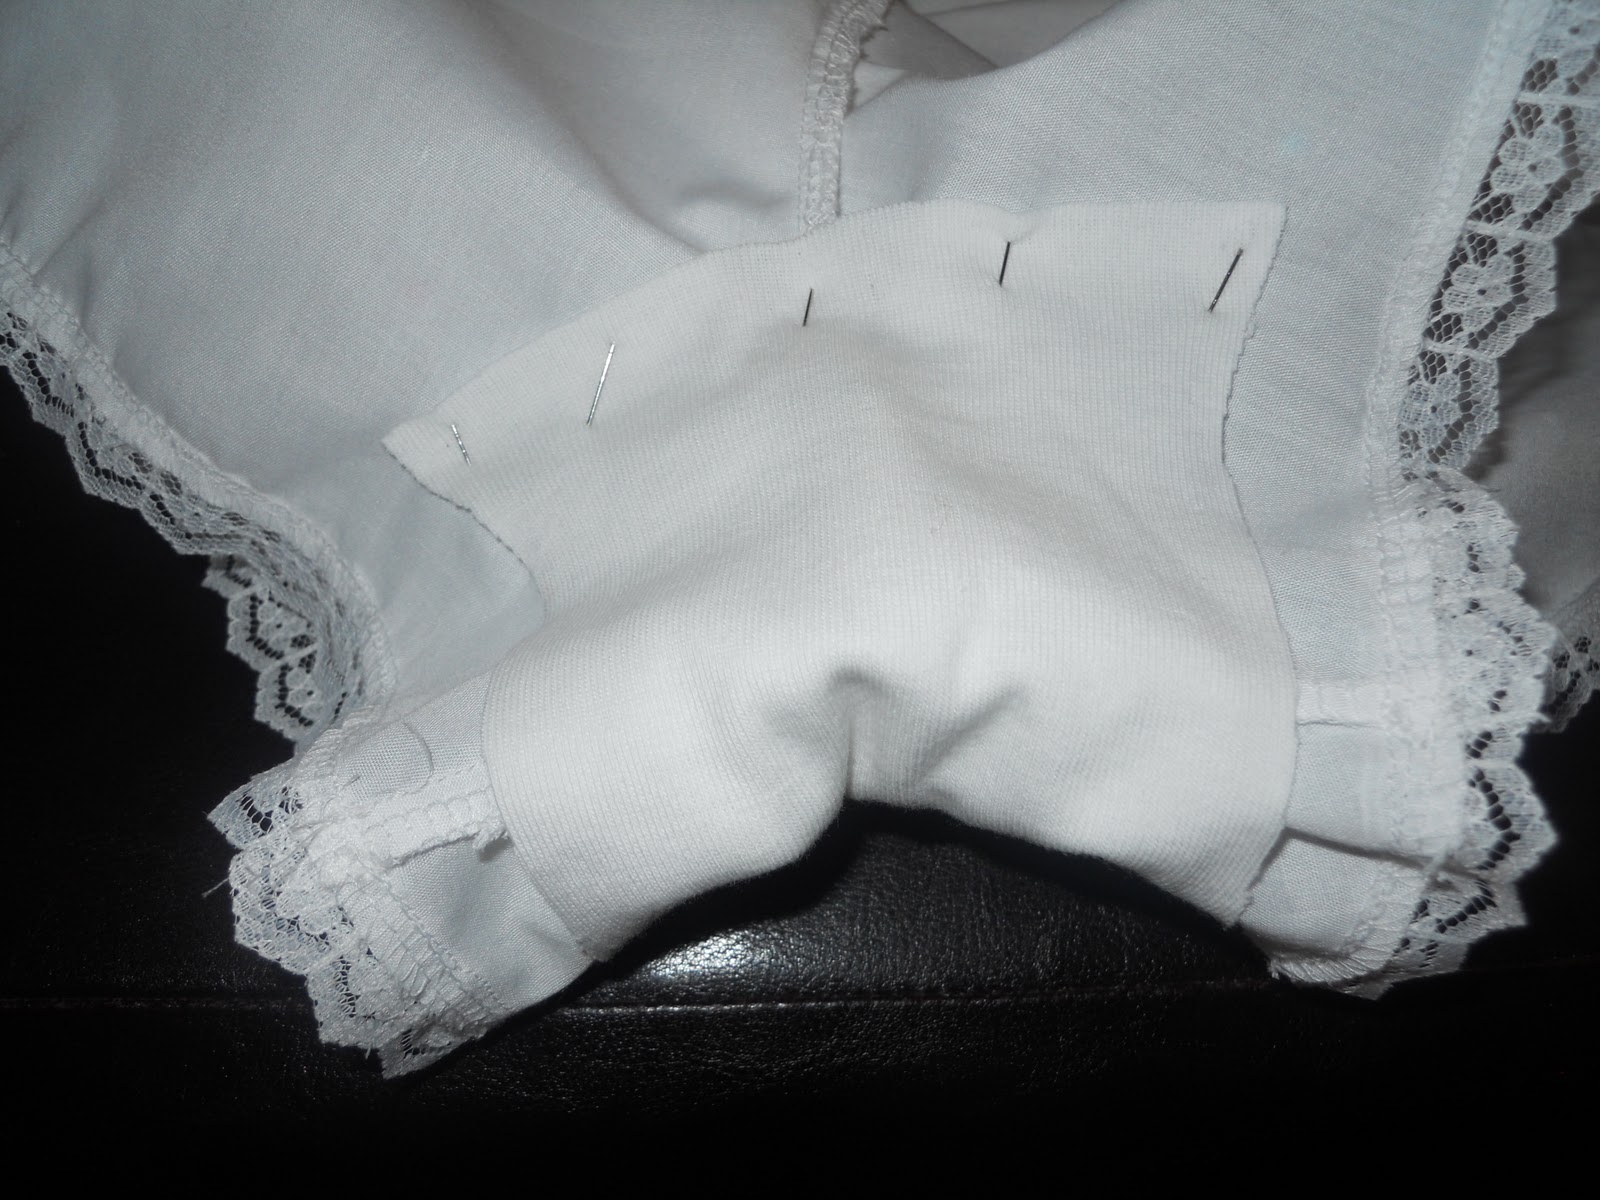
After a little cussing at it, I got it centered over the center seam of the panties, and pinned down.  On the right side of the panties, I took my #4 double needle and stitched down on the needle line, locking the raw edges of the knit in place.


After it's sewn down, all that's left to do is add the casings and the elastic. 


If you look closely, you can see the double line of stitching that holds the gusset in place.  Honestly,  I think this might've been easier with, say, Vogue 8060!

Monday, January 16, 2012

Brilliant Basics: Darts

I've heard quite a bit about imperfect darts--how they're puckery and sometimes nippley.  But honestly, darts aren't that hard.  And I had quite a few in my 1950s toddler slip.  Part of that was my decision to line the slip instead of mess with bias tape because even with the darts, it's easier.  I had eight darts to take care of on a slip for a three year old! Darts are, essentially, a way to shape fabric so that it fits closer to the body.  In the case of my project, I really think it's more for show than anything.  Darts are also one of the few things that I insist on ironing before sewing anything else.  I find that you can skip a lot of ironing that sewing manuals say you need (my grandmother was a professional seamstress and rarely ironed anything!).

So you've transferred your marks, and pinned the darts.  The next step is to sew 'em.  I've done it from both directions, and to be absolutely truthful, the results look better if you start from the fatter side of the dart.  ;) But I had two little girls who wanted Aunt Laura to pay attention right then and none of the other four adults that were here would do!

 Be sure to leave long tails of thread on both sides, because you'll need them for the next step.


Once the darts are sewn in, the next step is to tie and clip the thread tails.  I usually go with a square knot, but a surgeons knot works exceptionally well.

After this, you have to iron it.  This will smooth out your seams, and can even help correct the tops of your darts a little if you've messed it up a bit.

 The ironing is really the last step.  I mean, you have to watch when you're sewing to keep everything where you've ironed it, but otherwise, you can move on in constructing your garment.


And after sewing up the rest of the slip, here's the result--a full skirted 1950s slip to go under Bit's dresses! (The 50s half slip, the crinoline slip, and the does-this-make-my-butt-look-big panties are under it in this picture, too.  Evie calls it her "ballerina dress".)

Tuesday, January 10, 2012

A "Duh" Moment

If you're like me, you have moments in sewing when you get an epiphany and smack yourself upside the head because you just discovered something so obvious that you wonder why it took you so long to see it clearly.  This one was a couple years back when working on Simplicity 2629.  See, it's a vintage reprint of a 1948 layette pattern.  And it has embroidery.  Lots of embroidery.  So I got a ink transfer pen and transferred the embroidery pattern.  And then it came time for the knife pleats.  Until then, no matter how hard I tried with tucks and pleats, out of a set of ten one would end up crooked.  It drove me nuts!  So here I am, having just heat transferred the embroidery design, staring at the transfer pen when it hit me.  Transfer the dang marks!  After all, the pleat lines are clearly marked on the pattern, and it would even give me a line to sew on.

As time has passed, I learned that transfer paper is a better way to go, and that it also works for darting and any other sort of pattern marking that ends up being essential. (Ink bleeds through light colored fabric.  And it's permanent.  These wash out and come in different colors in the same package for different color fabric)


So today, after finishing Bit's pettiskirt (more on that and the crinoline slip tomorrow)  I cut out her slip and put that old "duh" moment to use and transferred the dart markings.

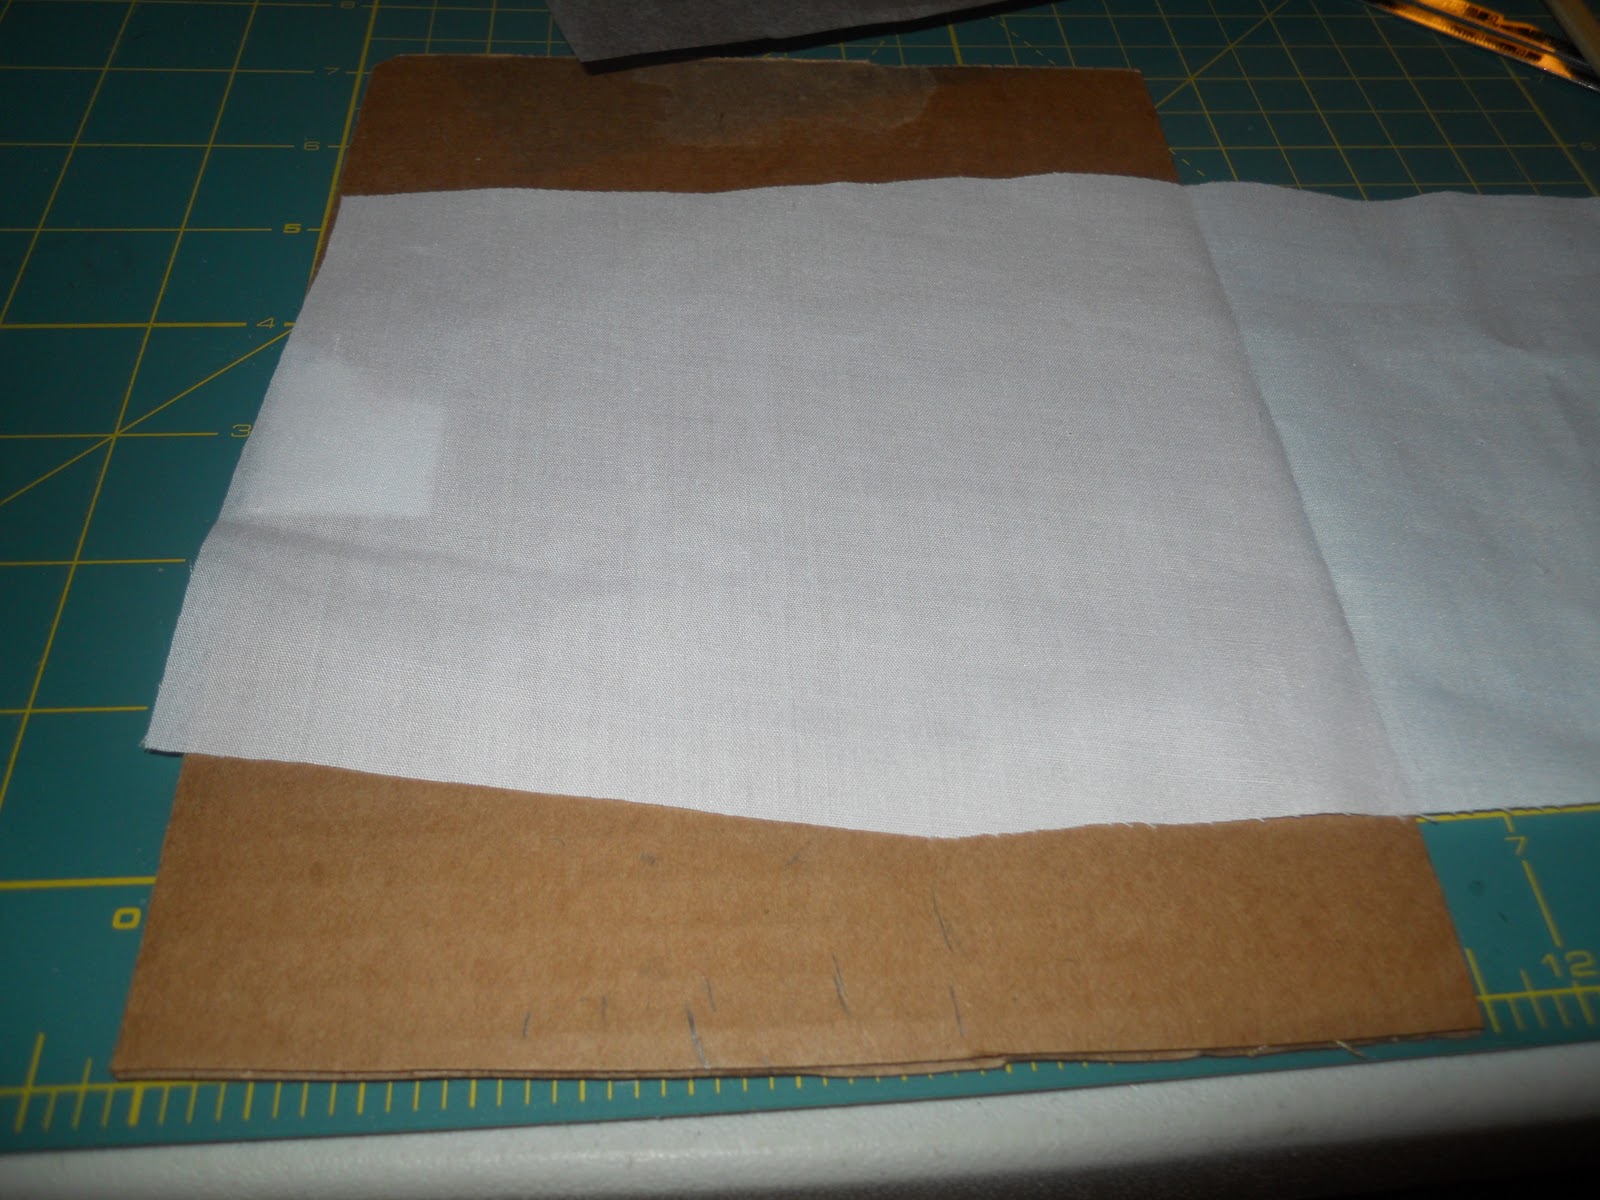
Okay, so here's the cut out pieces of both the slip and panties.  I also have a piece of cardboard for extra support (and to know where to line everything up to!) the transfer sheets, a mechanical pencil, a ruler, and a chopstick.


I purposely don't iron the front bodice of things until later, because it gives me a center line to work from, and this is no exception.  I lined that line up against the straight cardboard edge, and then lined the paper up against that.  The pattern piece goes on top of that, with the cardboard giving you a nice, straight edge to keep everything in the right place and straight.

The next step is to take the chopstick and mark over the dots.  When you could take the seam gauge (aka the only ruler I could locate because the others are packed) and go over the lines, you'll get clearer, more accurate lines if you wait.

Graphite washes out, so a common, everyday mechanical pencil is my marking tool of choice.  Line up the dots with the ruler and draw in your dart line.  Now, repeat with your other side and any other markings you care to transfer.


Now you have perfect markings.  Pin along them, follow the lines on them to sew the darts, pleats, or tucks, and you get perfect results every time.

I also transfer placement lines for things like ruffles on ruffle butt panties, and sometimes button hole markings, too!

And one more, a bonus "duh" moment.  For perfectly placed collars on back button pieces, also leave in the fold mark--at least temporarily.  Sew the shoulder seams together, sew and turn the collar pieces, and then bar tack them together.  Then place the bar tacked collar pieces on the center fold line and start pinning.  Sew it and you've got a perfectly placed collar!

Monday, July 26, 2010

1946 dress- homemade bias tape


I use quite a bit of commercial bias tape. It's very useful for nicely finishing curved raw edges where french seaming won't work. It's worth it to me to buy the stuff because making my own is expensive fabric-wise and time consuming. I know there are machines out there that automatically do the pressing and folding for you, but I don't have one, so I do it the old fashioned way--by hand and iron. In cases where you need an exact match to the fabric, knowing how to make your own is essential. And making your own cording is pretty much the same thing, though that's a topic for another day.

The first thing you know is that bias tape is meant to be stretchy, so that it can easily go around curved edges. This means that you need to cut it on the cross-bias, or diagonally on the fabric. Because it's in long strips, I prefer breaking out a quilting tool--my rotary cutter, mat, and ruler. (Yeah, I quilt, too.)

The first thing to do is make the piece of fabric into a square. Because I wanted to know which way the grain was running, it meant cutting off another edge other than the selvage edge. Next, I folded it into a triangle and cut the end on the fold--


Now, commercial bias tape, which we're trying to emulate, is approximately 1 inch wide. So we need to cut 1 inch strips. The ends of these strips aren't going to be straight, because for all intents and purposes, we cut diagonally across a square. We need to square them up to be of any use to us.

Next, we lay one strip over another and pin them diagonally and sew them together. The number of strips you sew together depends on how much bias tape you need. Make sure what will be your seams are all on the same side of the fabric, because we want the raw edges neatly tucked in. Check before you sew it. A few seconds of checking saves a few minutes of unpicking!

Next, trim off the excess fabric-- And start ironing! First, the seam allowances need ironing open. This is just about the only thing I bother with doing that. While you're at it, press the whole strip to get rid of the cutting creases. Then, starting at the beginning, fold it in half and press lightly--just enough to get a visible line. After that, start over again. (See? I told you this would take some time. It's just like making quilt binding, only quilt binding takes longer because there's more of it!) Fold the raw edges to the line you just made and press them in place. We're going for really good creases here, so don't be afraid to be aggressive about it.

Once you've finished, you have bias tape! I can count on one hand the number of times I've needed to do this, because it doesn't have to match exactly on the inside of a garment. A shade or so off doesn't really matter. But for say, the collar of my latest project, it does matter because it's out in the open.

In the morning, I'll go over the next steps--a bit of french seaming, stamping the embroidery pattern, and doing a bit of fancy hand stitchery.

1946 dress- Cutting out and first steps


Okay, so you've found a great pattern and you want the garment pictured. So you go to the store and buy the yardage it says you need on the back of the pattern envelope. The first thing you should know is to always round up to the nearest yard... just in case. In the case of my latest project, I needed around a yard and a half extra because of the changes I made to construction.

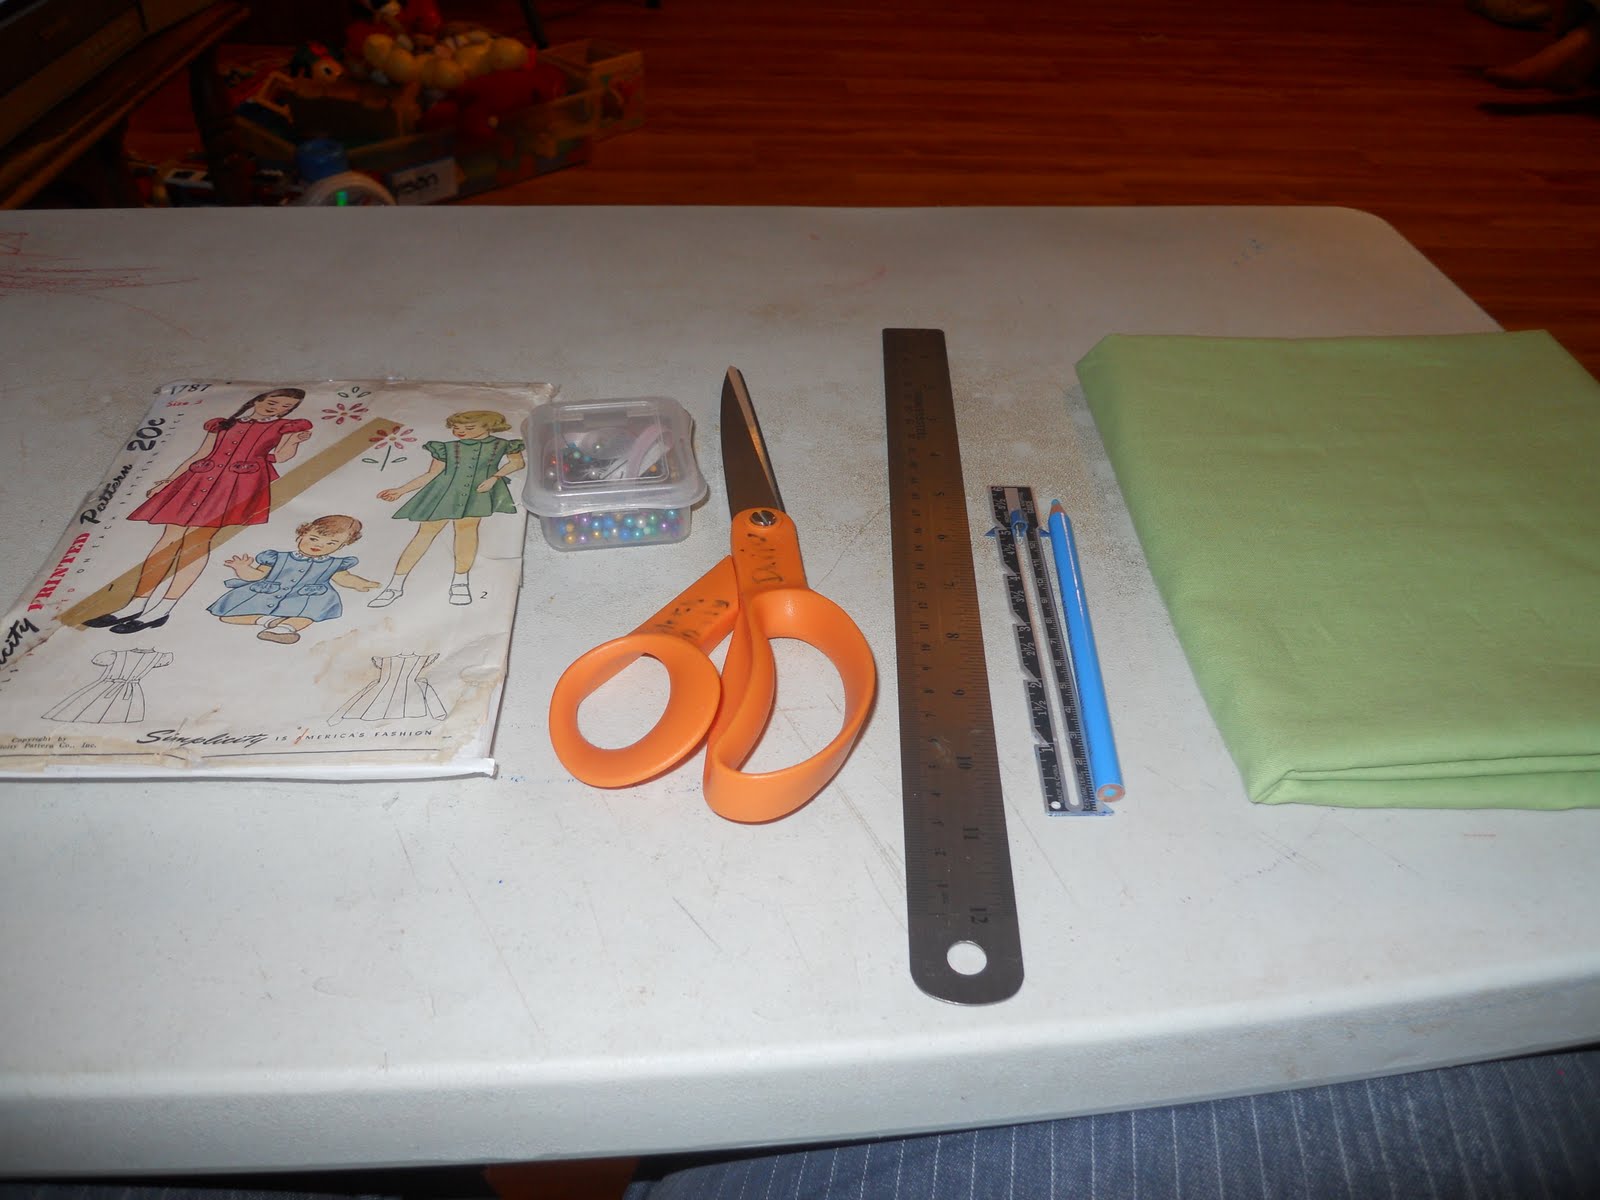
And here's the pattern. So now that we have the pattern, we need the rest of our tools. So we've gathered together a water soluble fabric pencil, scissors, a seam gauge, pins, the fabric, and a ruler. Next, we need to unfold the fabric and start pinning the pattern pieces to it. Some people use weights, but if you're sewing with a child or children in the house, pins are more secure! I mean, anything shiny is a magnet for a toddler to appropriate and yell, "MINE!" So we're going to pin it! I'm not sure if you can see it, but there's an arrow pointing horizontally on the pattern pieces. Now, this arrow points in the direction of the grain of the fabric. I've never been able to see it, but Mom says it's there. You cut this way because cutting cross-grain gives you more stretch to the fabric, which you usually don't want. Now, the grain of the fabric always runs parallel to the fold and the selvage edges. The selvages are the edges where the fabric was attached to the machine that wove it. If you look closely, you can see the tiny holes were it was attached to the machine. The arrows appear on every pattern piece except for pieces that are cut on the fold, because they're going to run with the grain anyway.

Now most people who sew start with washing and ironing both the fabric and the pattern. If the pattern is exceedingly wrinkled, I'll iron it, and the same for the fabric. But I've never had shrinkage problems after washing, so I usually don't bother to prewash my cotton. Most of what I work with is either cotton/poly blends, quilters' cotton, or cotton broadcloth. Basically, it's inexpensive fabric that with a bit of effort can look very expensive.

So, we've pinned down the first pattern pieces. Because this is a 1946 pattern for a little girl, it's going to be short. The back of the pattern envelope has a "finished garment length". This is important, because it tells us how short it will be. My next step is to go to the Simplicity website and check out the lengths of the same size dress. (The sizing on the big four hasn't changed since about the 1920s.) This dress is a size 3 and its finished length is 17.5 inches. I want plenty of room for Gracie to grow, so I left the 4 inch hem that the pattern calls for. Now, a dress that comes just below the knee for a size three is between 22 and 23 inches, so I'm going to add five inches to the skirt. This is where the seam gauge, ruler, and fabric pencil come into play. I set the seam gauge for 5 inches, and measured from the bottom of the skirt. Normally, I'd use the lines built into the pattern to add inches, but I didn't want to cut into a 1946 pattern, and the baby was trying to steal away my supplies, so I just added to the bottom. We'll keep using the seam gauge along the bottom, just to make sure that the measurement stays the same, and repeat for all four pieces of the body of the dress.

Now that we've made the dots, it's time to connect them with the ruler. When I'm adding length, I prefer to draw out the extra cutting lines so I have something to follow:


Next, we cut out, following both the pattern and the lines. Next, We need to cut out the four sash pieces and the sleeve ruffles. (I took pictures, but can't seem to locate them!) The sleeve ruffles are too long for the folded fabric, so we need to open the fold. I decided to make both the ruffles and the sash double sided, so we need four of each piece. I prefer to cut in twos. So now those are cut out, and we need to cut out the collar. Most collars are cut on the fold, and this one is no exception. I'm doing it double sided as well, so I cut two.

Next, we need to cut interfacing for the front button plackets and the collar. The pattern doesn't call for it, but interfacing is always a good idea. The last thing we need to cut out for this dress is bias strips for bias tape. More on that in the next post.